In this tutorial I want to go into something I’ve learned while creating a personal project called A Closer Look into the Division of Occupations & Age: how to place SVG text on arcs or paths. And how to combine this with d3’s existing donut-chart-like layouts.
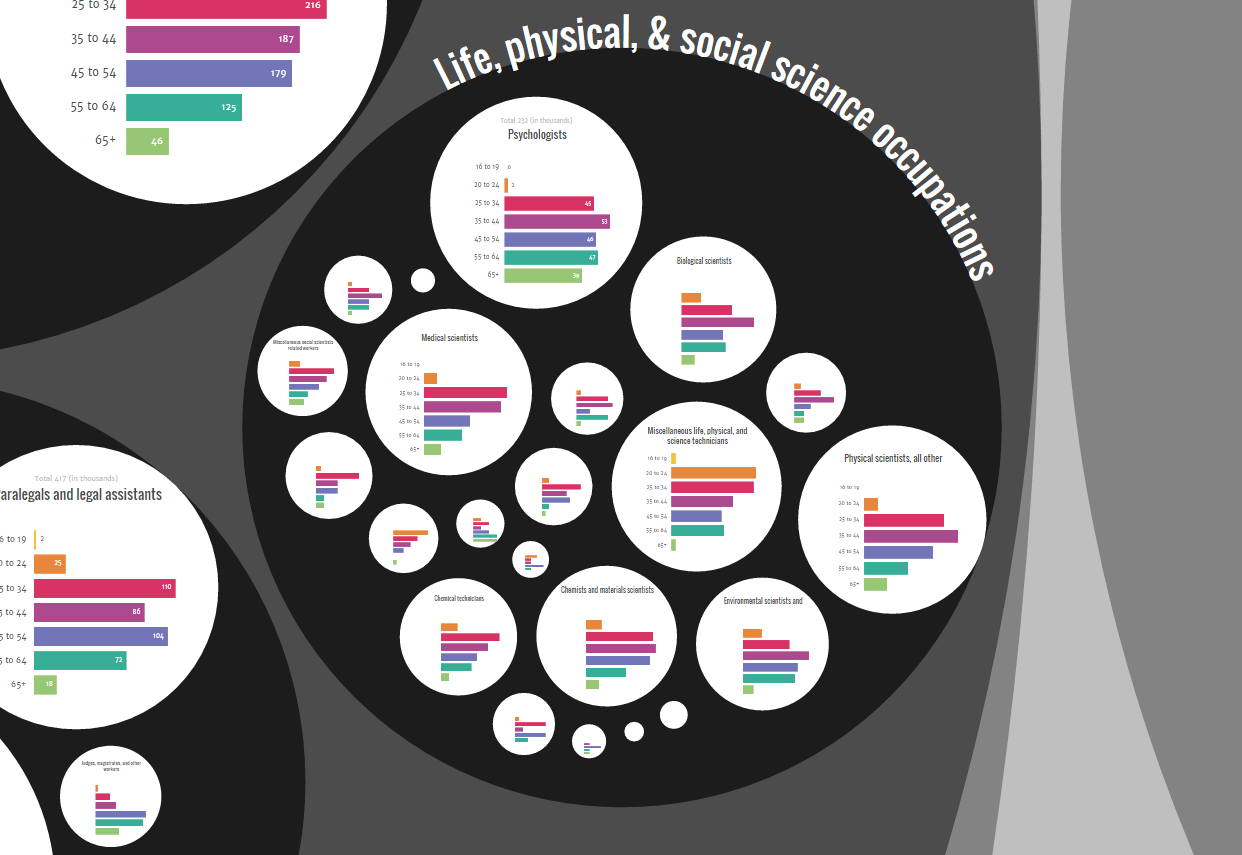
Because I’ve placed bar charts inside each circle in the Occupations piece, I couldn’t just put the text in the middle of a circle as well, like the standard zoomable pack layout has. Placing the titles of parent circles on the outer edge of the circle seemed like the most fitting alternative in my opinion. But circle packing is definitely not the only case when placing text on a non-straight line could come in handy. Let me illustrate this with several examples.
The basics
Starting off with the bare necessities. You really don’t need to do much to place text on any kind of path that you want. The first thing that you need is the path itself. You need to tell the browser what the exact shape is along which the text needs to be placed. Once you have that figured out, you can append a textPath element to the SVG, which tells the browser that the text needs to be rendered along the shape of a path.
SVG paths can take a whole array of wonderful shapes. For a good tutorial on the different shapes they can take please look at this SVG path element tutorial. One random example of a path notation to create a wavy line path is M10,90 Q100,15 200,70 Q340,140 400,30. Below you can see the result of placing text on this SVG path.
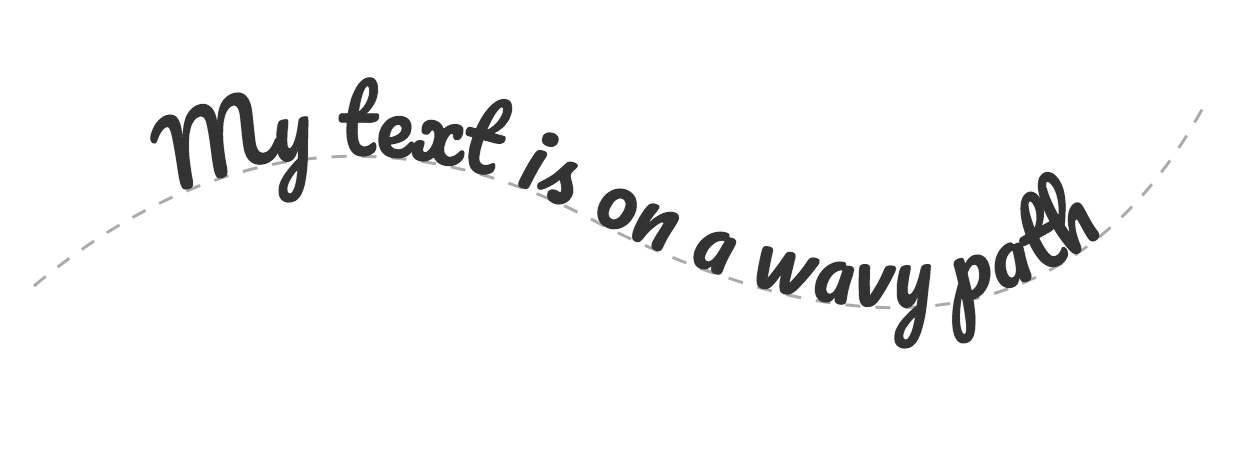
Usually you want the path itself to be invisible and only see the text. In that case set the fill and stroke to none
Don’t worry too much about how this looks, in the following steps I’ll explain how to create a circular path notation which is very straightforward and in many of the later examples d3 easily calculates these paths for you.
The code for the above image can be seen down below. Create an SVG and append a path element to it. You supply the arc notation to the d attribute of the path. It’s very important to give this path element a unique id that you can reference later on when creating the textPath element.
After the path element, you have to create a text element to which a textPath element can be attached. Just appending the textPath to the SVG will not work, it needs to be appended to a text element first.
Next comes the important path, you need to supply the id of the path along which you want to place the text. This can be done with by providing the xlink:href attribute with the id. Afterwards you really only have to add a .text() statement and it will all work. The text would be placed on the arc and be positioned on the left starting point. To make the text center on the arc, add a startOffset attribute and text-anchor style that you can see in the code
//Create the SVG
var svg = d3.select("body").append("svg")
    .attr("width", 400)
    .attr("height", 120);

//Create an SVG path (based on bl.ocks.org/mbostock/2565344)
svg.append("path")
    .attr("id", "wavy") //Unique id of the path
    .attr("d", "M 10,90 Q 100,15 200,70 Q 340,140 400,30") //SVG path
    .style("fill", "none")
    .style("stroke", "#AAAAAA");

//Create an SVG text element and append a textPath element
svg.append("text")
   .append("textPath") //append a textPath to the text element
    .attr("xlink:href", "#wavy") //place the ID of the path here
    .style("text-anchor","middle") //place the text halfway on the arc
    .attr("startOffset", "50%")
    .text("Yay, my text is on a wavy path");
Creating an arc
Most other tutorials or stackOverflow questions that I found while figuring this out myself stopped right about here. But I do typically create (endlessly) long tutorials, so read on if you want to see what other interesting things you can do.
If you’re not interested in knowing how to write an SVG arc command, that’s fine too, just skip ahead to the next section
Although you’re able to place text on any kind of path that you can think of with the M’s, Q’s, A’s and Z’s of the SVG path element, most of the time you’ll just want to place text along a circle. Therefore, I wanted to go a bit deeper into the path notation of an SVG arc. Let me first show the different elements and afterwards explain them one by one.
//Creating an Arc path
M start-x, start-y A radius-x, radius-y, x-axis-rotation,
large-arc-flag, sweep-flag, end-x, end-y
First we need to supply the location of the starting position. This is done with the M (from move) command followed by the x and y coordinate of this location on the screen. This is not unique to arcs, you need to supply this for every kind of SVG path. We can draw an arc with the A command followed by the radius of the arc in the x and y direction. For circles both of these numbers are the same. The third parameter is the x-axis-rotation. This sets the rotation of the arc’s x-axis. Leave it at 0.
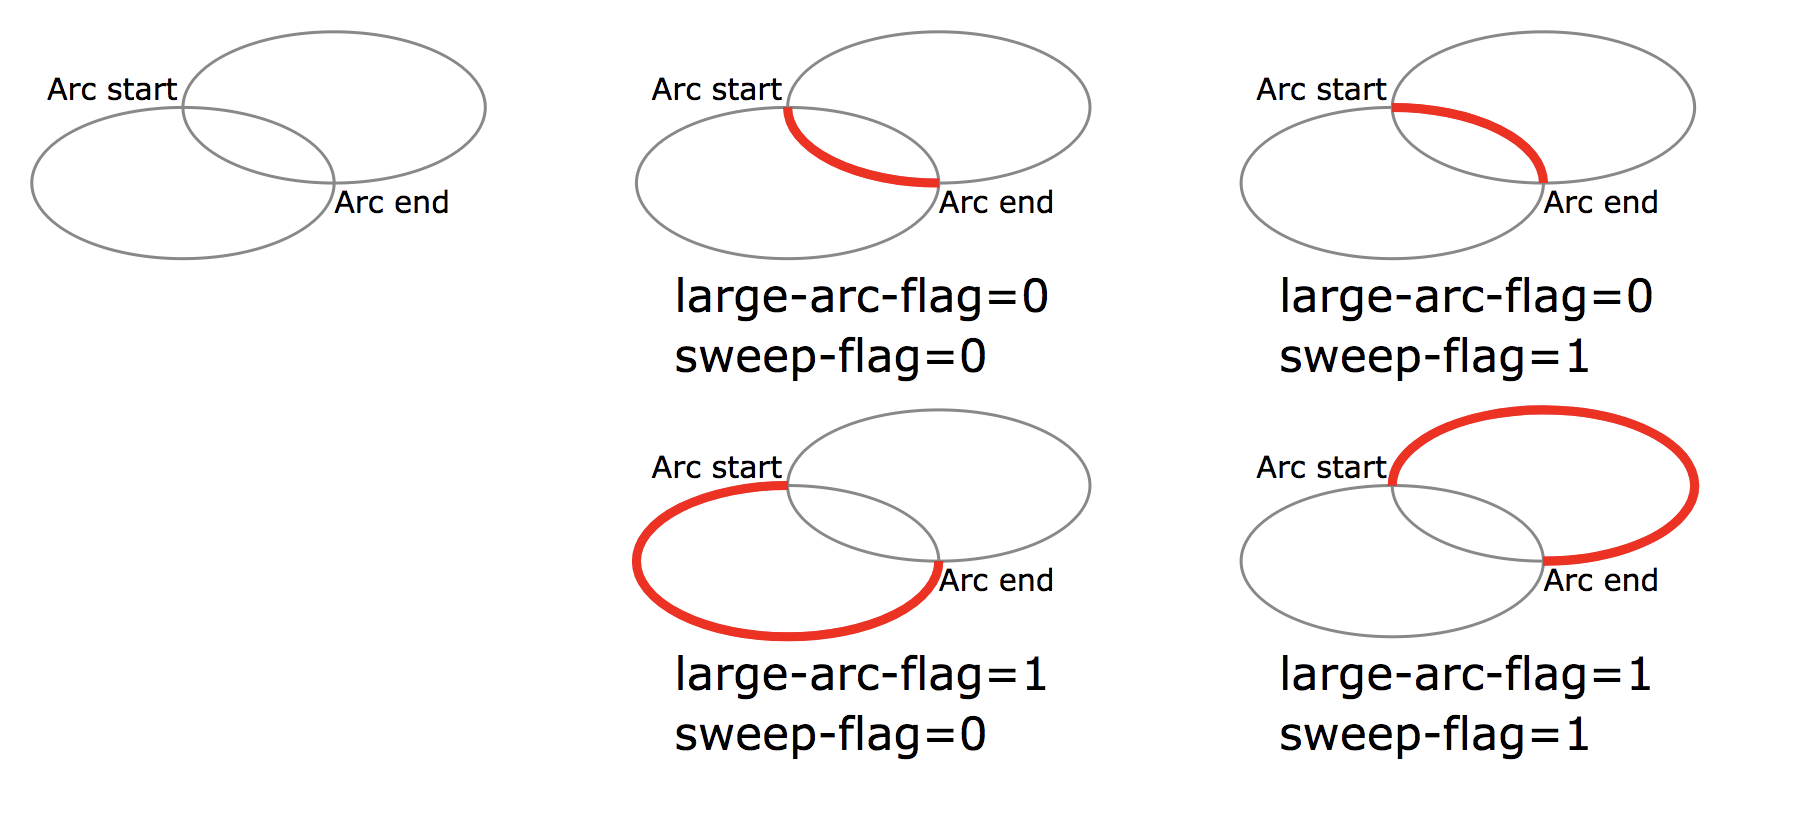
The large-arc-flag & sweep-flag are needed because just supplying the start and end position together with the radii still leaves you with 4 possible arcs that can fit that description (for ellipses). I found that w3 gives the best explanation and image:
- Of the four candidate arc sweeps, two will represent an arc sweep that is >180 degrees (the large-arc), and two will represent an arc sweep that is <180 degrees (the small-arc). If
large-arc-flagis 1, then one of the two larger arc sweeps will be chosen; otherwise, iflarge-arc-flagis 0 one of the smaller arc sweeps will be chosen. - If
sweep-flagis 1, then the arc will be drawn in a positive-angle/clockwise direction. A value of 0 causes the arc to be drawn in a negative-angle/counter-clockwise direction.
And finally the position of the ending x and y coordinate are supplied to the arc notation.
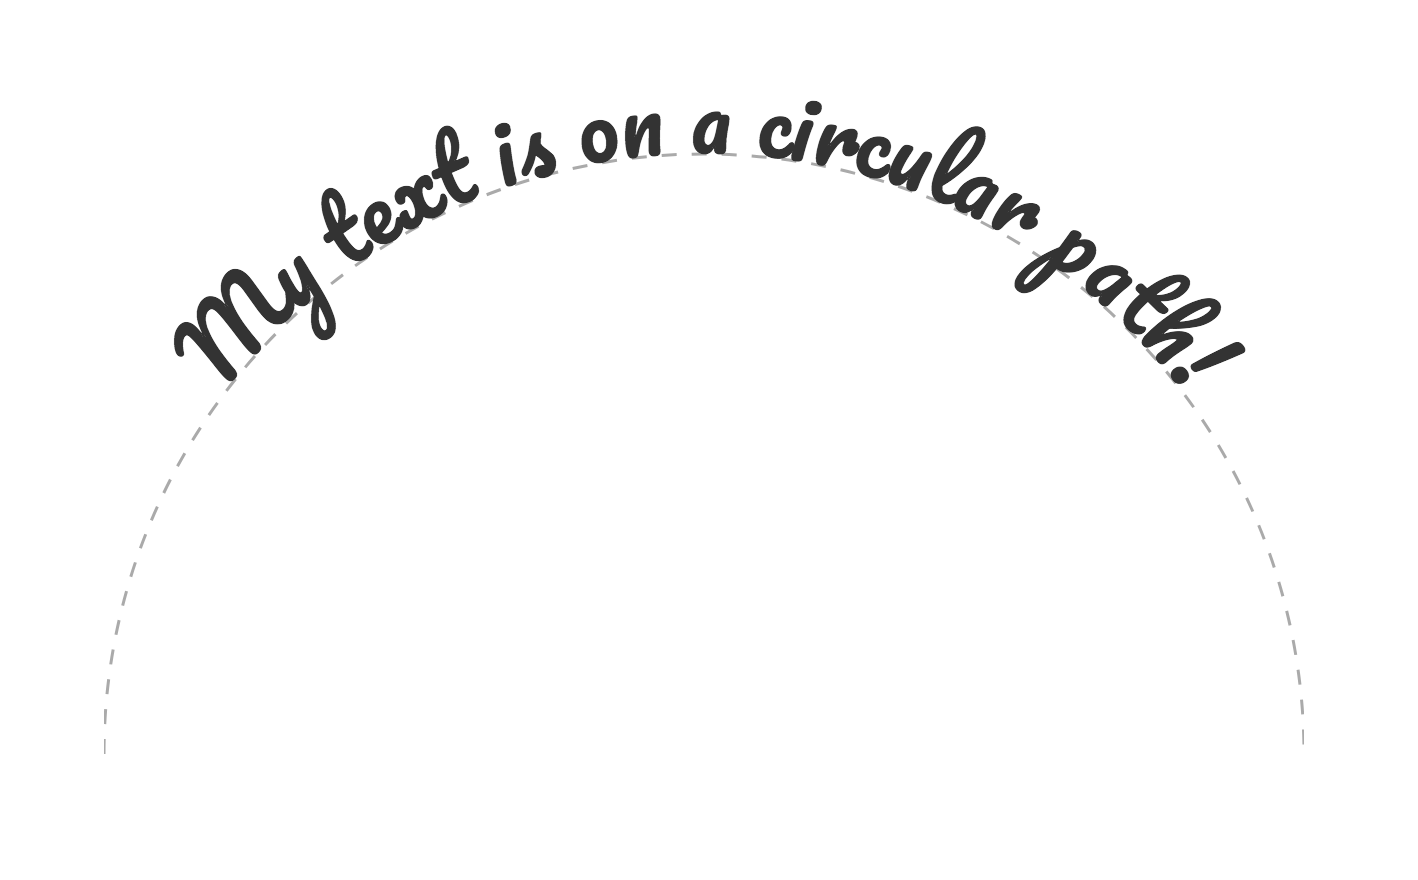
To get the image below, we can use the script supplied in the previous section and replace the arc notation by M 0,300 A 200,200 0 0,1 400,300. Which will become a half circle, starting at [0,300] pixels with a radius of 200px (a circle). As always, no x-axis-rotation. Since I made an exact half circle, the large-arc-flag doesn’t actually have any impact and both 0 and 1 give the same result. I want the line to run clockwise from left to right, thus the sweep-flag has to be 1 and finally the path ends at the location of [400,300] pixels
Simple animations with arcs
Creating a transition between two different arcs is actually quite easy. You only have to update the original path element itself and the text will move with it automatically. So all you have to do to go from the bigger circle in the section above to a somewhat smaller circle is add the following code to the script. It calls a transition of the path and supplies an arc notation of a smaller circle.
//Transition from the original arc path to a new arc path
svg.selectAll("path")
    .transition().duration(2000).delay(2000)
    .attr("d", "M75,300 A125,125 0 0,1 325,300");
It’s also possible to transition between more complex paths, but usually you can’t use the default .transition() statement and supply the new arc notation afterwards (I’ve tried). Luckily Mike Bostock has supplied a nice example of a function that is capable of providing an interpolation between any kind of SVG path. Using the pathTween function from the example, you can transition between the path of the very first image in this blog to the second image in this blog. And again, you only have to transition the path element, the textPath will follow whatever happens
Adding arcs to donut charts
One option for placing texts along arcs is when creating donut charts. In this instance we can use the arc notations that the d3.svg.arc() command creates for us as paths to stick a textPath to.
You can find the full code of all the examples to come in the links in the last section of this blog
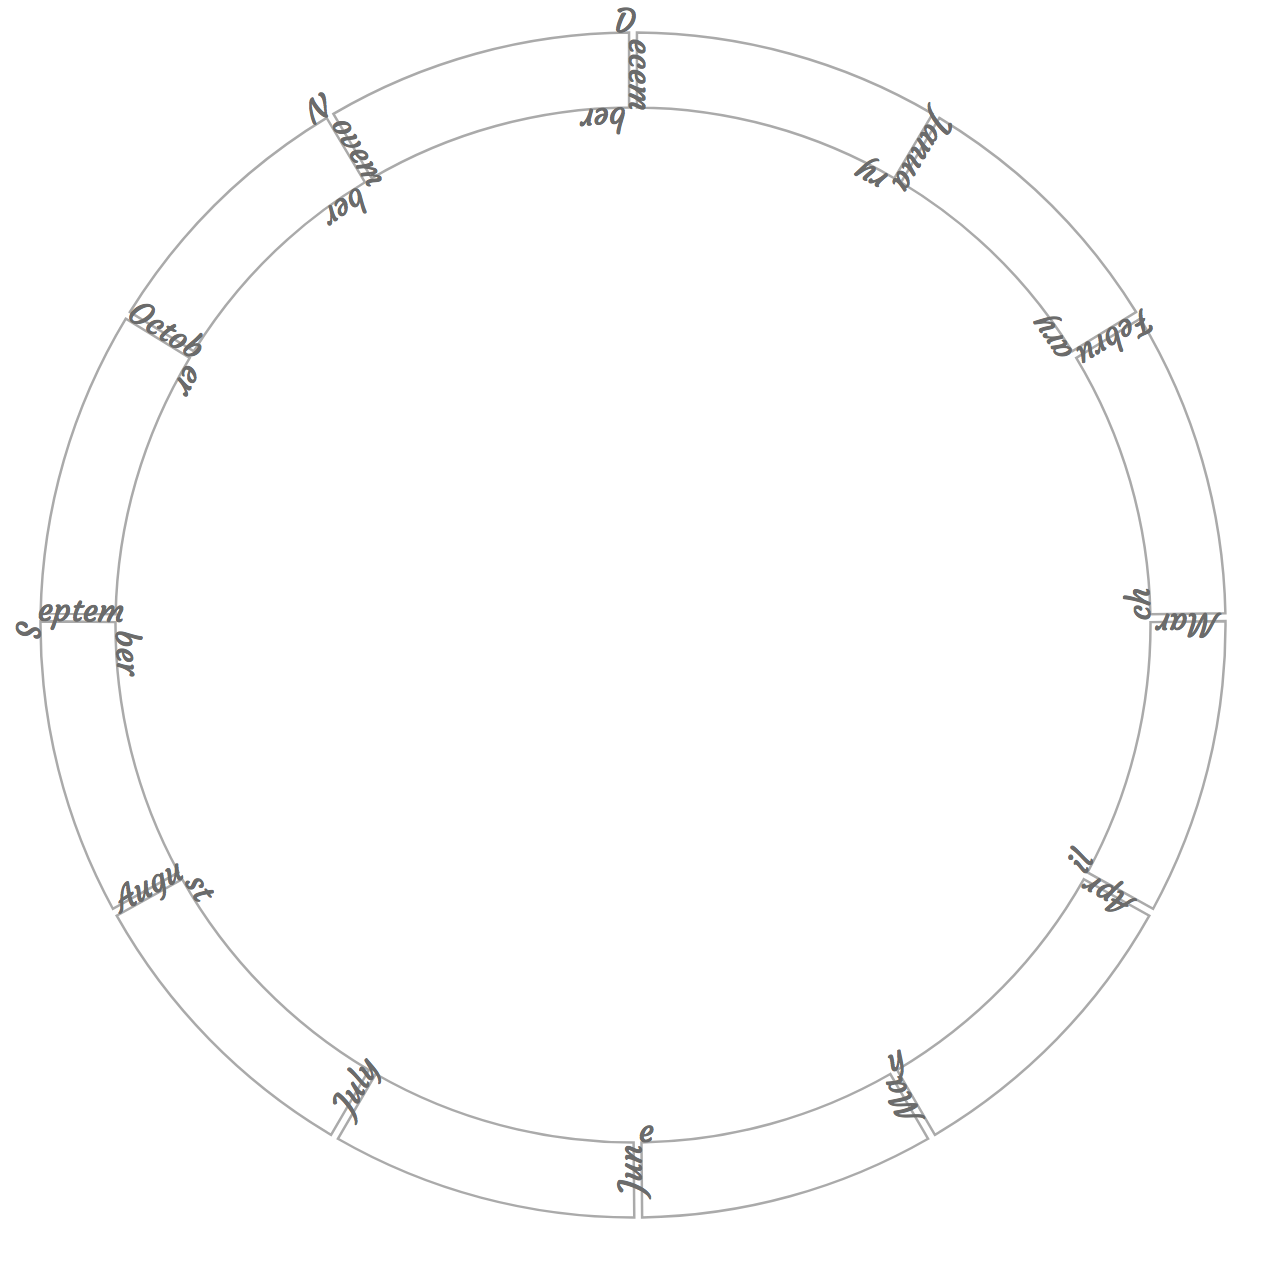
For this example I want to create an arc where each slice is a month in a year. I’ve created a dataset that supplies the starting day number (in the year) and ending day number for each month. I won’t go into how to make a donut chart, but once you create the donut slices, you have to supply one extra command, and that is giving each slice that unique id
//Draw the arcs themselves
svg.selectAll(".monthArc")
    .data(pie(monthData))
    .enter().append("path")
    .attr("class", "monthArc")
    .attr("id", function(d,i) { return "monthArc_"+i; }) //Unique id for each slice
    .attr("d", arc);
It can be as simple as using the iterator i to create unique id’s. Next append the text and textPath elements to the svg
//Append the month names to each slice
svg.selectAll(".monthText")
    .data(monthData)
    .enter().append("text")
    .attr("class", "monthText")
    .append("textPath")
    .attr("xlink:href",function(d,i){return "#monthArc_"+i;})
    .text(function(d){return d.month;});
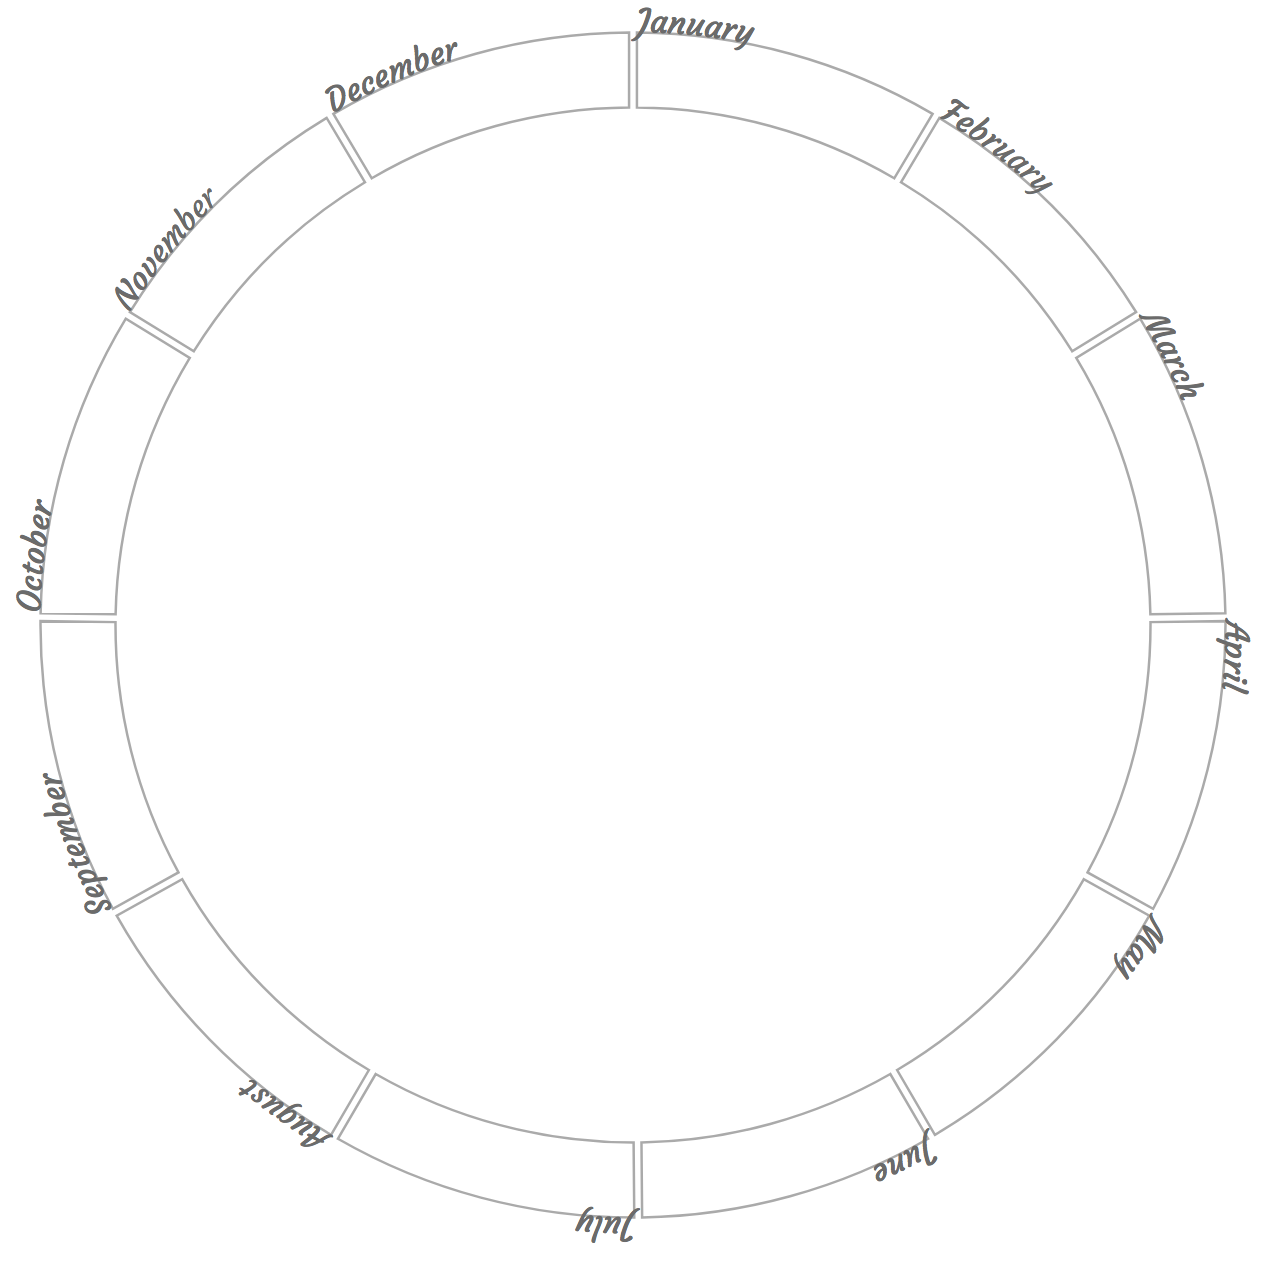
You can see the resulting image below. The text begins at the starting position of each arc and follows its contours
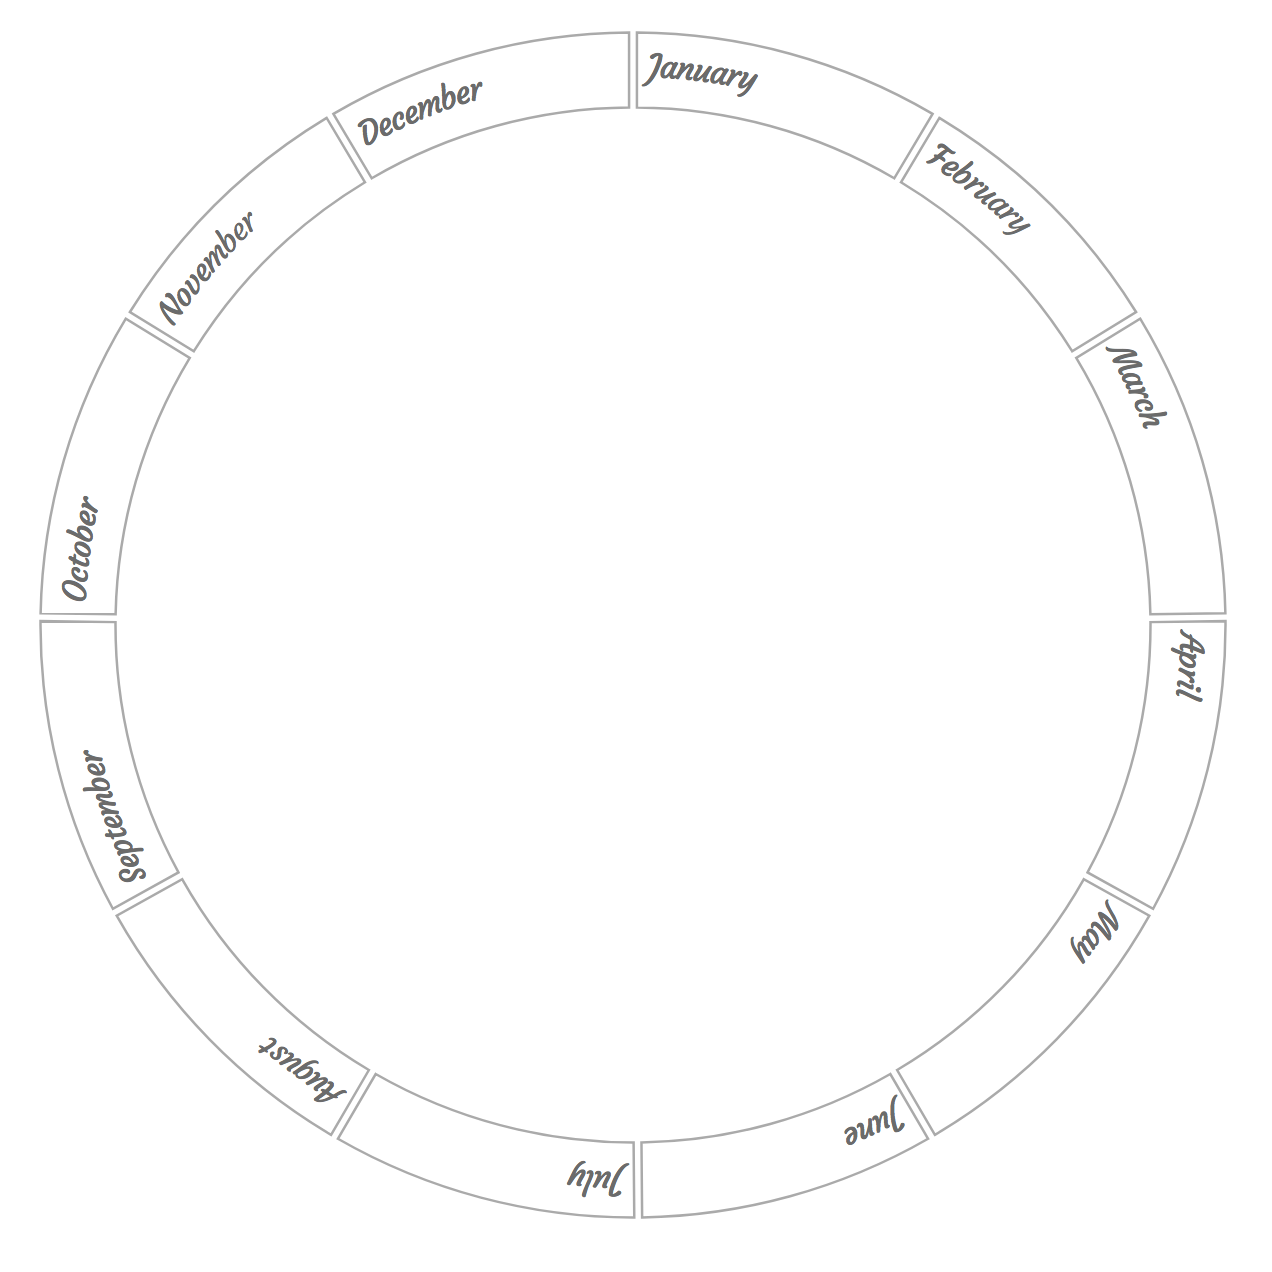
But I want the text to be placed inside each arc and a bit away from the starting line. To do this, I can add an x attribute to move it along the arc and a dy attribute to move it above or below the arc
//Append the month names within the arcs
svg.selectAll(".monthText")
    .data(monthData)
    .enter().append("text")
    .attr("class", "monthText")
    .attr("x", 5)   //Move the text from the start angle of the arc
    .attr("dy", 18) //Move the text down
    .append("textPath")
    .attr("xlink:href",function(d,i){return "#monthArc_"+i;})
    .text(function(d){return d.month;});
Which results in the following image. Pretty easy right? We didn’t even have to do anything with actual arc notations to create this
Centering text along donut charts
You might wonder why centering the text from the previous example along the arc, instead of placing at the start would need its own section. Why not use the text-anchor and startOffset like before?
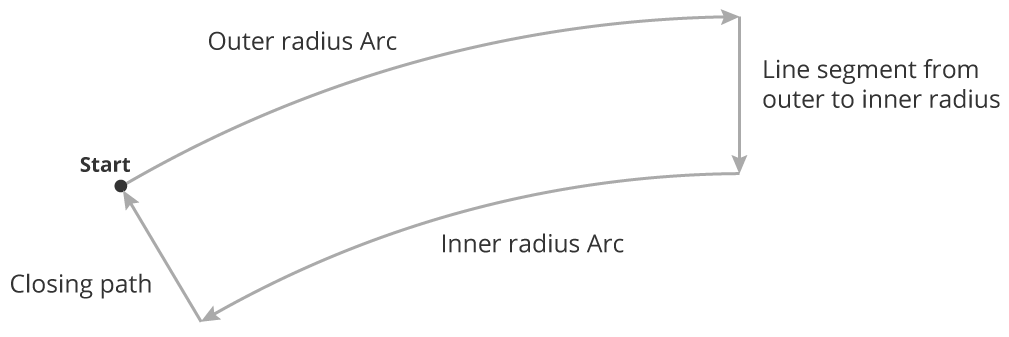
The problem is that the actual arc of each donut slice is the entire outline. So an arc section on top at the outer radius + a line segment + another arc section for the inner radius and then it closes the path, which happens to look like another line segment.
So if you set the startOffset to 50% like we did before, you might now expect the kind of image that results
I leave it up to you to imagine what the length of each animal’s slice might represent…
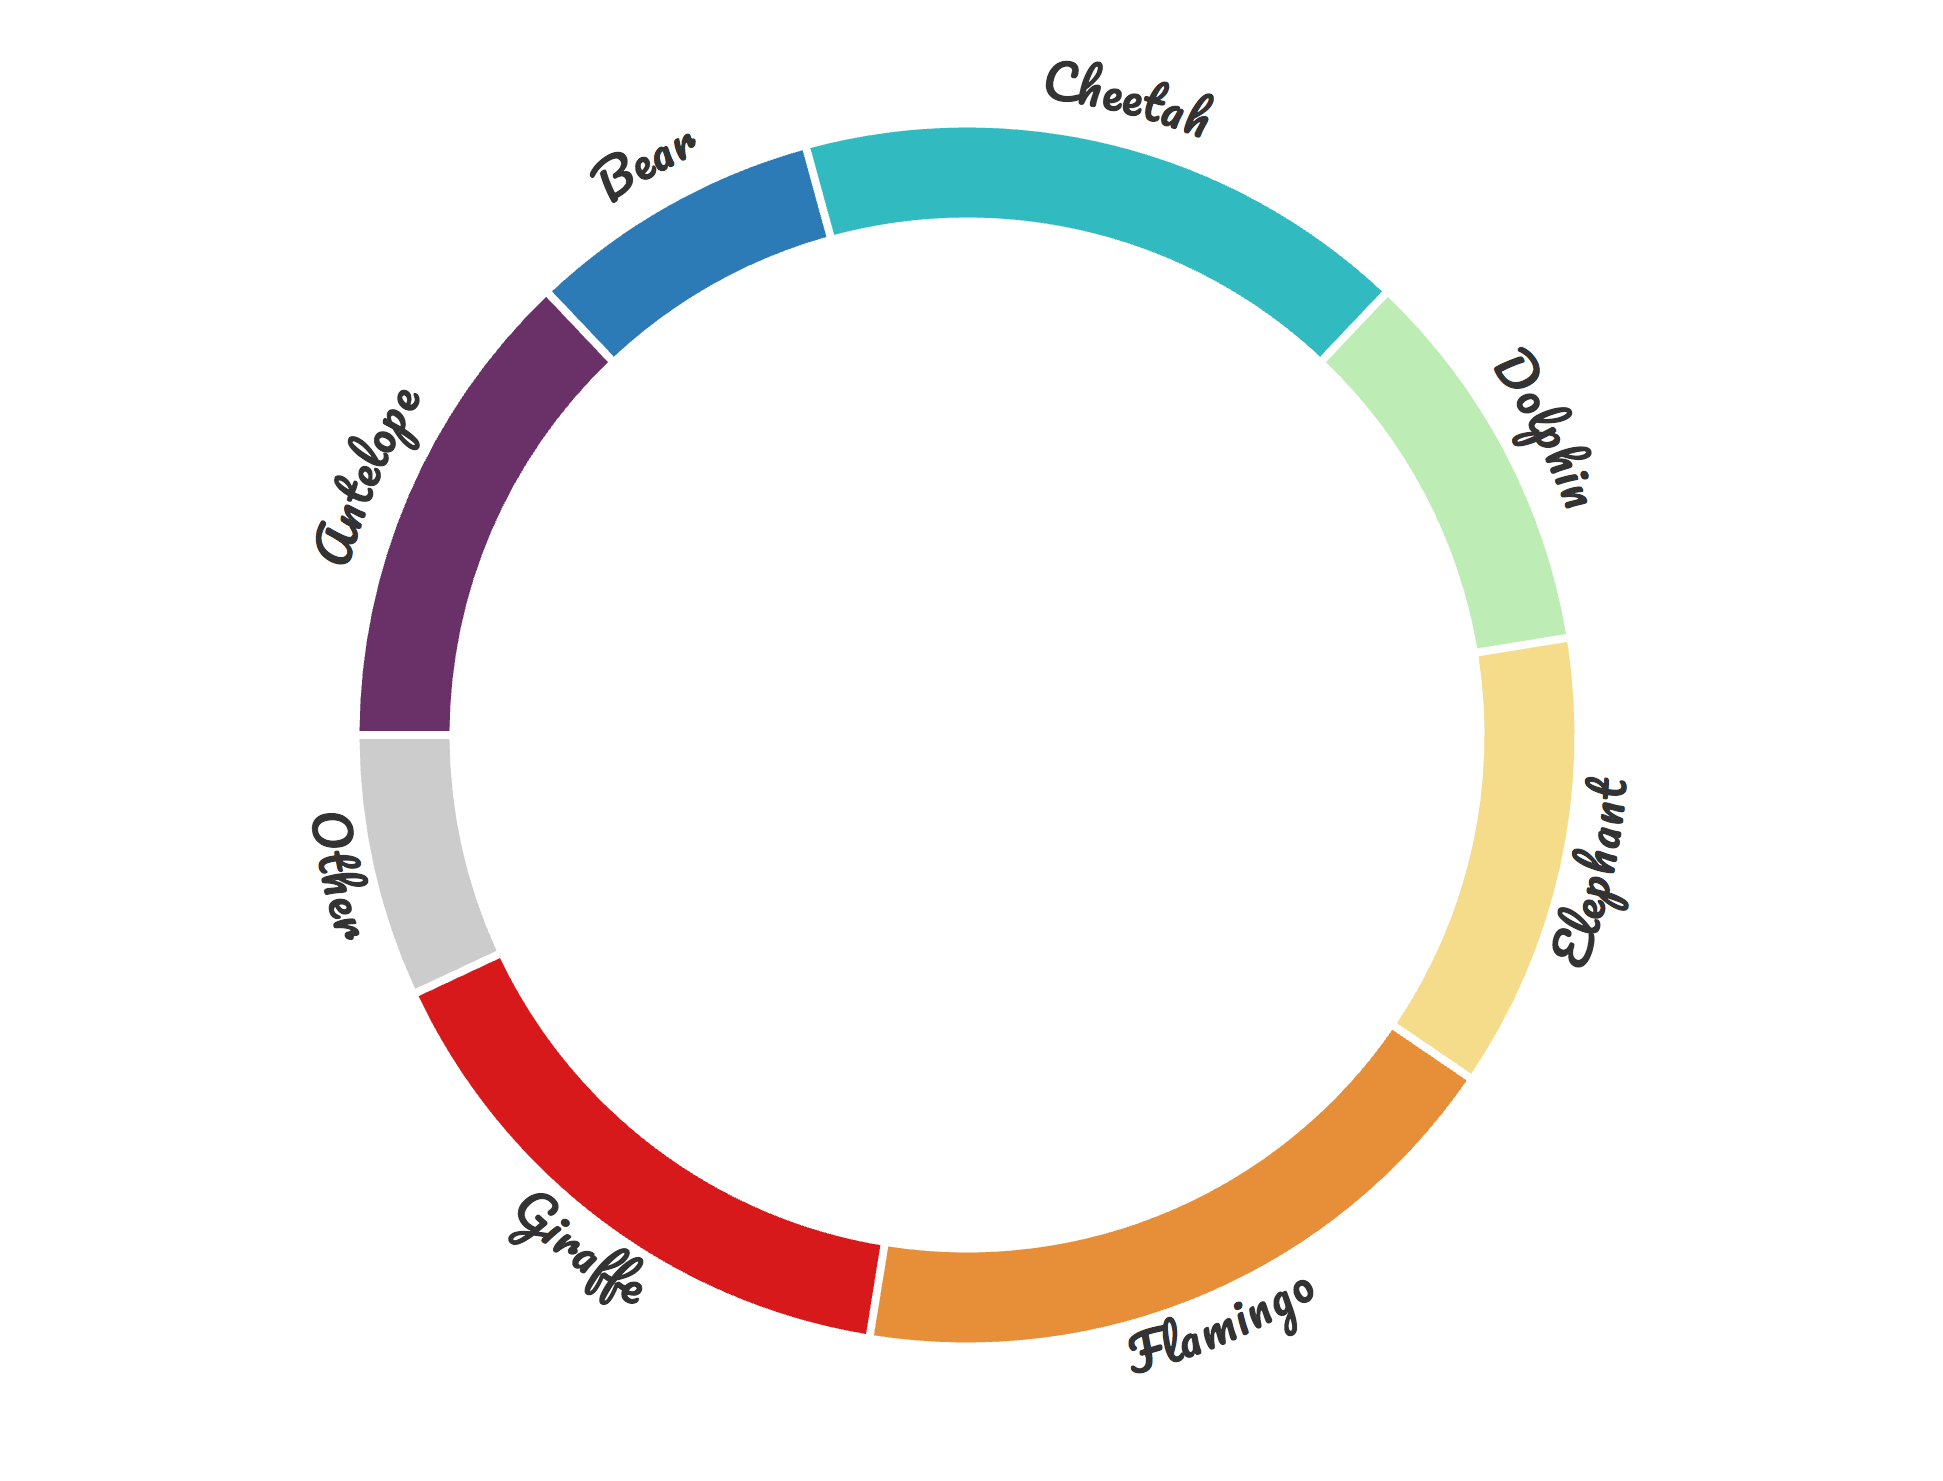
Luckily, we can do something about it. It doesn’t take many lines, but if you’re new to regular expressions some parts of the code might seem a bit odd to you. To change things up a bit I’ve created a completely random dataset about animals and turned this into a donut chart. I already added the label names and placed them along the start of each slice.
One other change is that I made this donut chart start at -90 degrees instead of at 0 degrees. It makes things easier to explain later on. Changing the starting angle can be achieved in the d3.layout.pie() statement with the startAngle and endAngle
//Turn the pie chart 90 degrees counter clockwise, so it starts at the left
var pie = d3.layout.pie()
    .startAngle(-90 * Math.PI/180)
    .endAngle(-90 * Math.PI/180 + 2*Math.PI)
    .value(function(d) { return d.value; })
    .padAngle(.01)
    .sort(null);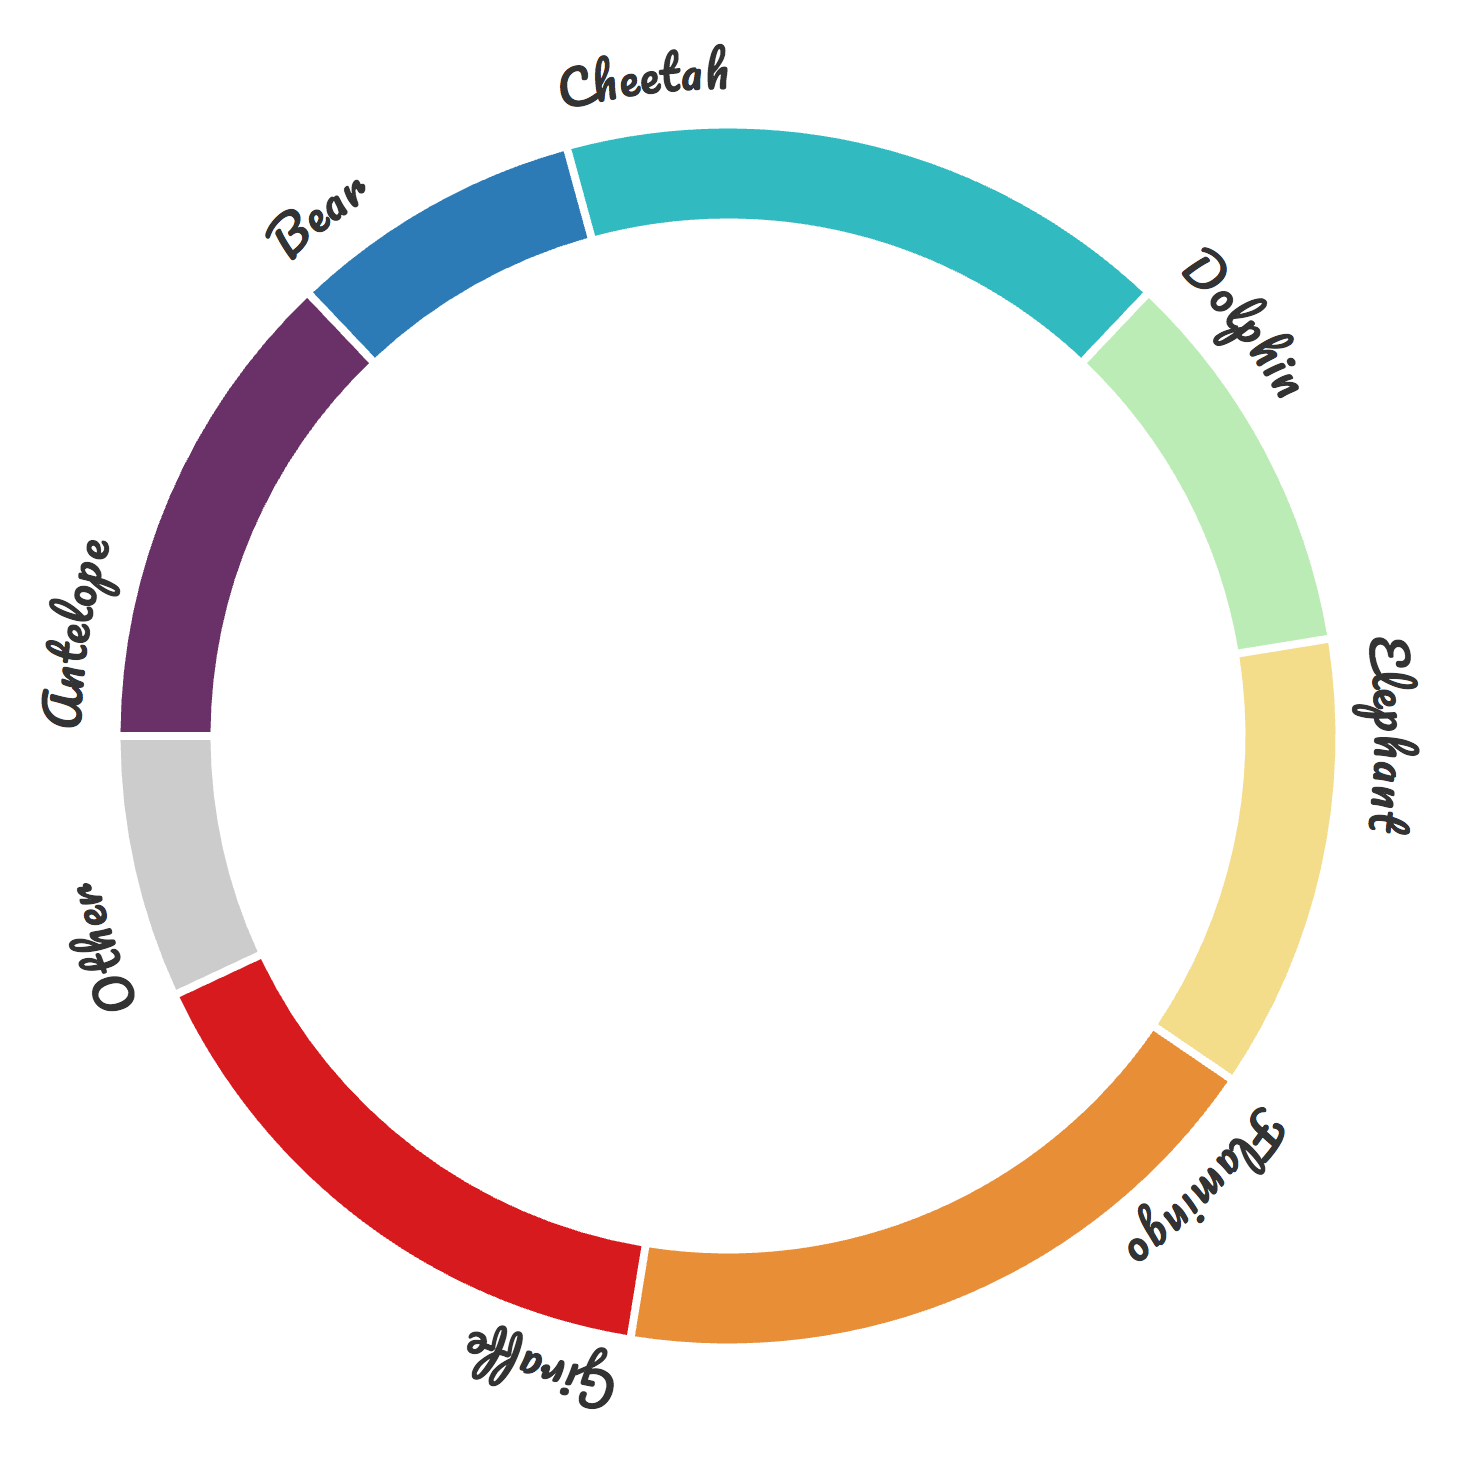
We can inspect the total arc statement for the Cheetah slice with arc(pie(donutData)[2]), which returns the following path
//The total arc statement of the Cheetah slice
M -52.2173956570654,-195.6517150213447 A 202.5,202.5 0 0,1 138.3415227728006,
-147.87789921723495 L 117.70250731088419,-126.10459853919384 A 172.5,172.5 0 0,0
-44.2910698933094,-166.71697912242166 Z
That’s a rather incomprehensible piece of text. But if we look closer, we can detect that the first part follows that notation for an arc path as explained before. Rounding it off a bit and placing some spaces, the first section reads M -52.2,-195.7 A 202.5, 202.5 0 0,1 138.3,-147.9. Which is an arc starting at [-52.2,-195.7] with a radius of 202.5, running clockwise to [138.8,-147.9].
To use the startOffset at 50% again to center the labels, we need to extract this first arc statement from the total arc path that d3.svg.arc() gives us and then create a second set of (invisible) arc paths that run only alongside the outside radius section of each donut slice. Let me first show you the code that does exactly this and explain it piece by piece next.
//Create the donut slices and also the invisible arcs for the text
svg.selectAll(".donutArcSlices")
    .data(pie(donutData))
    .enter().append("path")
    .attr("class", "donutArcSlices")
    .attr("d", arc)
    .style("fill", function(d,i) { return colorScale(i); })
    .each(function(d,i) {
        //A regular expression that captures all in between the start of a string
        //(denoted by ^) and the first capital letter L
        var firstArcSection = /(^.+?)L/;

        //The [1] gives back the expression between the () (thus not the L as well)
        //which is exactly the arc statement
        var newArc = firstArcSection.exec( d3.select(this).attr("d") )[1];
        //Replace all the comma's so that IE can handle it -_-
        //The g after the / is a modifier that "find all matches rather than
        //stopping after the first match"
        newArc = newArc.replace(/,/g , " ");

        //Create a new invisible arc that the text can flow along
        svg.append("path")
            .attr("class", "hiddenDonutArcs")
            .attr("id", "donutArc"+i)
            .attr("d", newArc)
            .style("fill", "none");
    });

//Append the label names on the outside
svg.selectAll(".donutText")
    .data(donutData)
   .enter().append("text")
    .attr("class", "donutText")
    .attr("dy", -13)
   .append("textPath")
    .attr("startOffset","50%")
    .style("text-anchor","middle")
    .attr("xlink:href",function(d,i){return "#donutArc"+i;})
    .text(function(d){return d.name;});
The first six lines are normal when creating a donut chart, we’ve even removed the line with .attr("id", ) since we are going to create new arcs for the textPaths. Next it goes into an .each() statement which will execute the code within for each data element. In here we can reference the data with the normal d and i. In this .each() section the arc notation of the outer radius is extracted.
By looking at that horrible arc path that arc(pie(donutData)[2]) returns, we would like to save the section from the start of the result until we get to the capital L (but not including the L) into a new arc path. This can be done by using a regular expression. A regular expression, or regex, is “a sequence of characters that define a search pattern”. If you’re serious about doing data analytics or visualization, you’re bound to run into these at some point.
The letter L in an SVG path denotes the start of a line segment
The variable firstArcSection saves the regex needed for the extraction. It will capture all in between the start of a string, denoted by ^, and the first capital letter L. The “all in between” is denoted by .+? where the . is a regular expression for “match any single character except the newline character”. The + means “match the preceding expression 1 or more times”. And since the . precedes it, it means any single character 1 or more times. The ? has to be added to make sure that it stops at the first L it finds, not the last L. It thus makes sure that the idea of ^.*L matches the fewest possible characters. For more information on regular expressions see this link.
The firstArcSection is applied to the total arc string that d3 has created for the donut slice (given by d3.select(this).attr("d")) and the result is saved in newArc. This is only the path section that runs along the outer radius of the donut slice (the arc) and is what we want to link the textPath to. Therefore a new (invisible) path using newArc is added to the SVG in the last section of the .each() with, of course, a unique id.
The code above is based on an answer that AmeliaBR gave on stackOverflow, but I can’t seem to find it again, sorry (╥_╥)
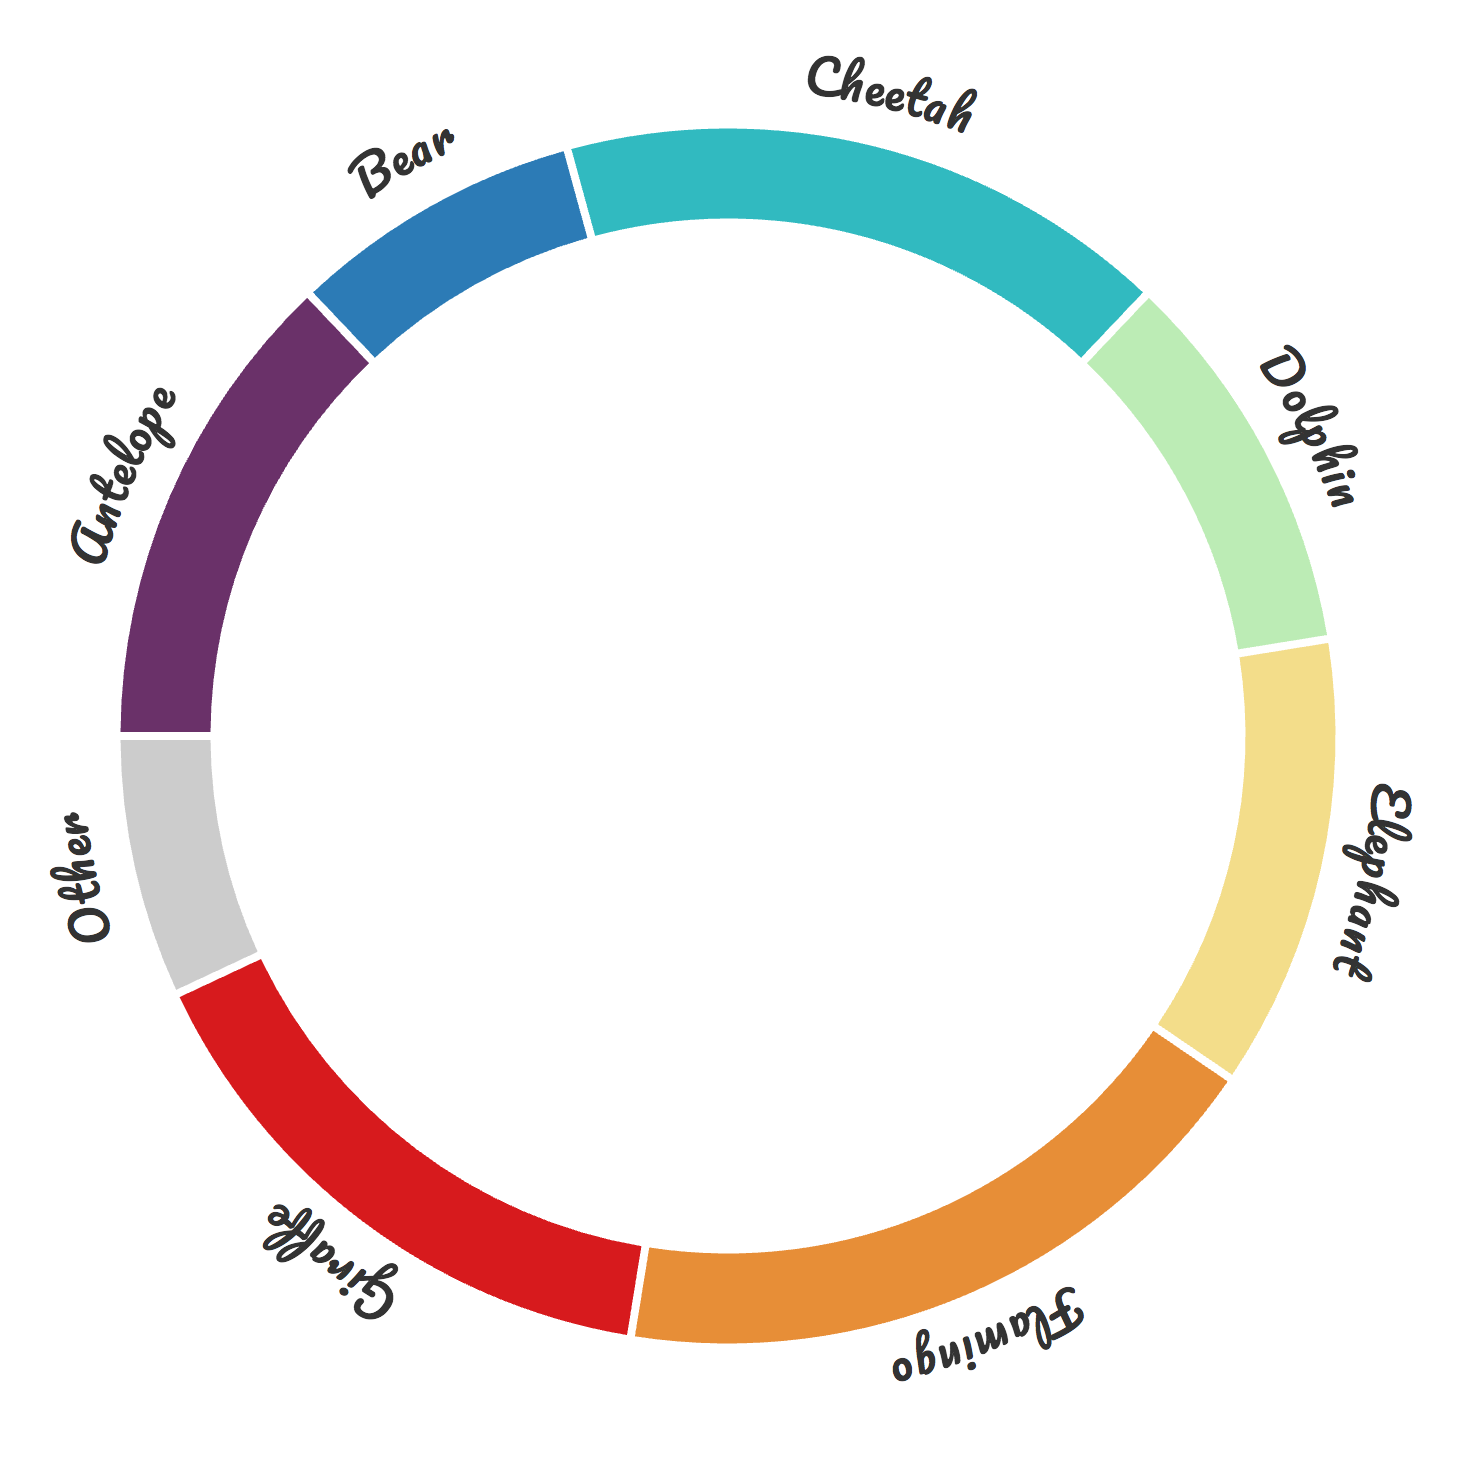
Afterwards, the labels are created just like before with a reference to the hidden paths. Now we can safely use the startOffset and text-anchor styles again. The resulting image looks as follows
Flipping the text on the bottom half
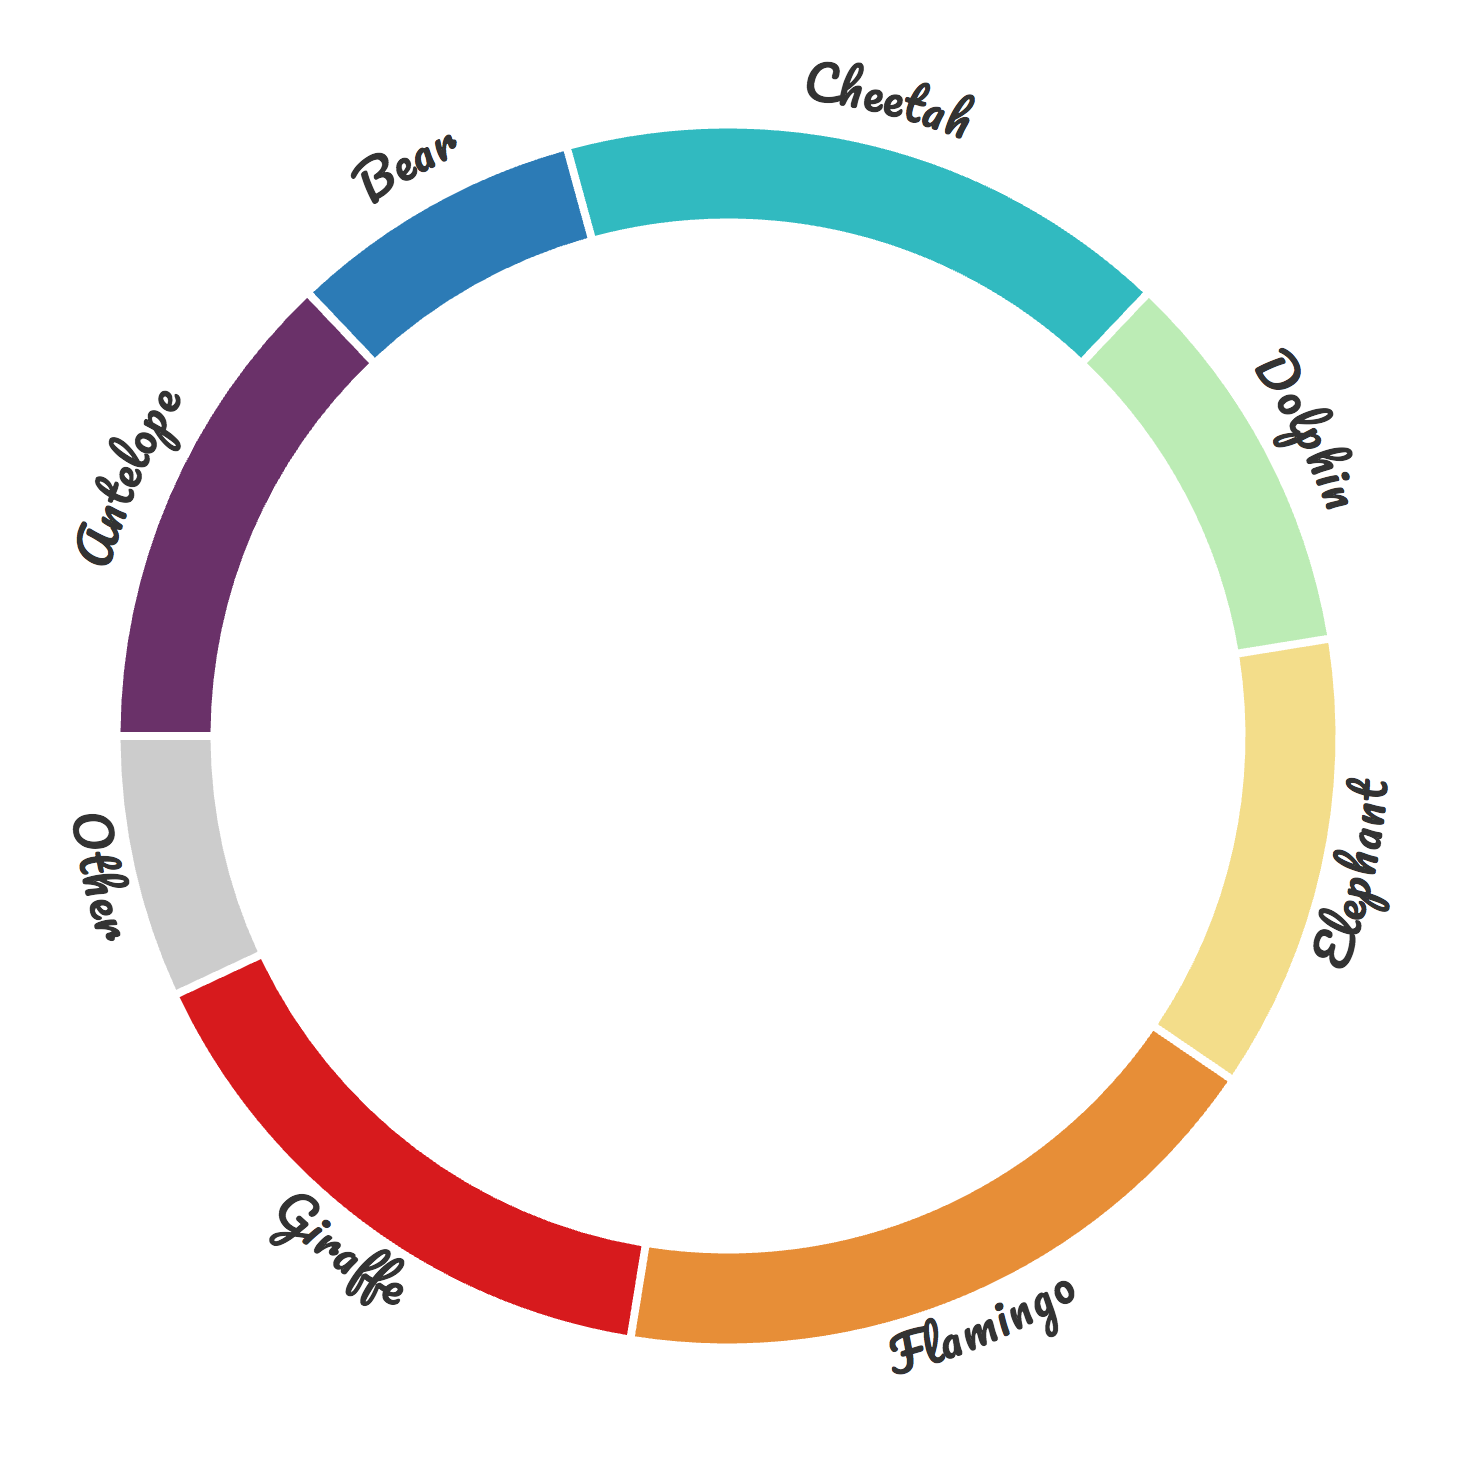
You could think that it’s finished with the look from the previous section. But I find those labels along the bottom half, that are upside down, rather difficult to read. I’d prefer it if those labels were flipped, so I can read them from left to right again.
To accomplish this, we need to switch the start and end coordinates of the current arc paths along the bottom half so they are drawn from left to right. Furthermore, the sweep-flag has to be set to 0 to get the arc that runs in a counterclockwise fashion from left to right. Thus, for the final act, let’s add a few more lines of code to the .each() statement
//Create the new invisible arcs and flip the direction for the bottom half labels
.each(function(d,i) {
    //Search pattern for everything between the start and the first capital L
    var firstArcSection = /(^.+?)L/;

    //Grab everything up to the first Line statement
    var newArc = firstArcSection.exec( d3.select(this).attr("d") )[1];
    //Replace all the commas so that IE can handle it
    newArc = newArc.replace(/,/g , " ");

    //If the end angle lies beyond a quarter of a circle (90 degrees or pi/2)
    //flip the end and start position
    if (d.endAngle > 90 * Math.PI/180) {
        //Everything between the capital M and first capital A
        var startLoc = /M(.*?)A/;
        //Everything between the capital A and 0 0 1
        var middleLoc = /A(.*?)0 0 1/;
        //Everything between the 0 0 1 and the end of the string (denoted by $)
        var endLoc = /0 0 1 (.*?)$/;
        //Flip the direction of the arc by switching the start and end point
        //and using a 0 (instead of 1) sweep flag
        var newStart = endLoc.exec( newArc )[1];
        var newEnd = startLoc.exec( newArc )[1];
        var middleSec = middleLoc.exec( newArc )[1];

        //Build up the new arc notation, set the sweep-flag to 0
        newArc = "M" + newStart + "A" + middleSec + "0 0 0 " + newEnd;
    }//if

    //Create a new invisible arc that the text can flow along
    svg.append("path")
        .attr("class", "hiddenDonutArcs")
        .attr("id", "donutArc"+i)
        .attr("d", newArc)
        .style("fill", "none");
});
The only thing that has changed since the previous section is the addition of the if statement. To flip the start and end positions, we can use a few more regular expressions. The current starting x and y location is given by everything in between the capital M and the capital A. The current radius is denoted by everything in between the capital A and the 0 0 1 of the x-axis-rotation, large-arc flag & sweep-flag. Finally the end location is given by all in between the 0 0 1 and the end of the string (denoted by a $ in regex).
Therefore, we save all the separate pieces in different variables and build up/replace the newArc using the final line in the if statement which has switched the start and end position. However, the textPath section needs a small change. For the bottom half arcs, the dy attribute shouldn’t raise the labels above the arc paths, but lower the labels below the arc paths. Therefore, we need a small if statement which will result in two different dy values.
To be able to use the d.endAngle in the if statement I replaced the donutData by pie(donutData) in the .data() step. You can still reference the data itself by using d.data instead of just d, which you can see in the .text() line of code.
//Append the label names on the outside
svg.selectAll(".donutText")
    .data(pie(donutData))
    .enter().append("text")
    .attr("class", "donutText")
    //Move the labels below the arcs for slices with an end angle > than 90 degrees
    .attr("dy", function(d,i) {
        return (d.endAngle > 90 * Math.PI/180 ? 18 : -11);
    })
    .append("textPath")
    .attr("startOffset","50%")
    .style("text-anchor","middle")
    .attr("xlink:href",function(d,i){return "#donutArc"+i;})
    .text(function(d){return d.data.name;});
And that’s how we end up with the final image below
The Code
I hope the examples above showed you enough variation to start using wavy & curvy texts in your own d3 visualization as well. To help you on your way, you can find full workable examples of all of the examples discussed in the blog in these links
- Animation - From a large to a small arc
- Animation - From a wavy to a circular path
- Months inside donut slices
- Animal donut chart - Default arc labels
- Animal donut chart - Centered arc labels
- Animal donut chart - Centered & flipped arc labels
And that’s it for the tutorial that originated from my A Closer Look at the division of Occupation visual. I hope you enjoyed it!
PS | As with most of my tutorials, the code above is only one way to do things. I wouldn’t be surprised if it’s not the most efficient way to do it, but it’s a way to accomplish things.